How to Record Digital Piano [Audio & MIDI]
It’s not necessary to spend hundreds on making a piano recording anymore. Once you own a digital piano (or keyboard) and a computer, you are well on your way to recording your music.
GOALS OF YOUR RECORDING
Our guide will help you understand your needs as well as the basics of MIDI and audio recording. We will explain the difference between audio and MIDI formats, discussing the benefits and limitations of each one. We’ll also show you the simplest ways to record your music.
THE DIFFERENCE BETWEEN MIDI AND AUDIO
If you are a musician and are going to make recordings, a good starting point is to understand the difference between audio and MIDI formats. Which one you need and for what purpose? The principal difference between audio and MIDI data is that audio consists of information on sound, like frequencies and amplitude, while MIDI data doesn’t. Instead, MIDI contains the information of the MIDI messages that are generated by your electronic musical instrument when you are playing it.
Thus, when recording an audio track, you are recording the sound. On the other hand, when recording a MIDI track, you are recording MIDI data. So, what is MIDI and how you can use these files? Let’s break it down and you’ll see that it’s much easier to understand than you think.
MIDI OVERVIEW
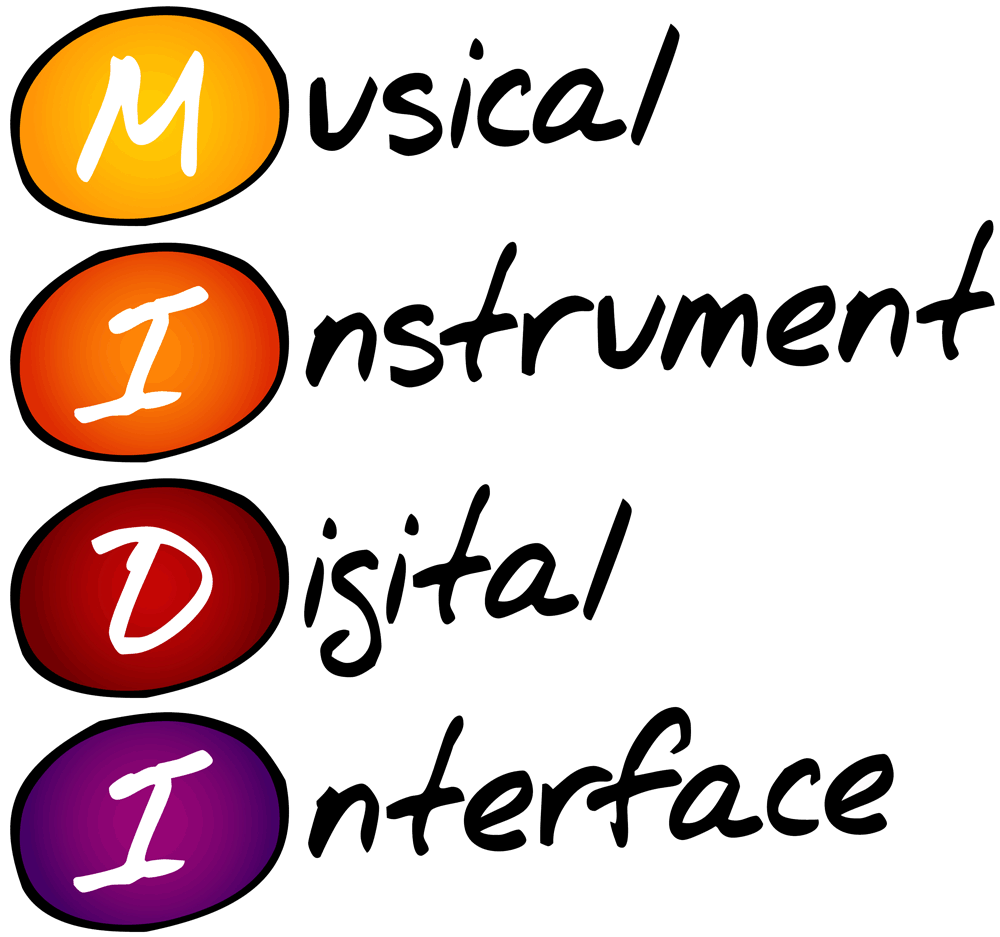
First of all, MIDI is an abbreviation for Musical Instrument Digital Interface. It was invented in the 1980s and is a protocol that allows computers and electronic musical instruments to communicate with each other. When you press a key on your keyboard, a sustain pedal, or use any other controller that your instrument has, you generate MIDI messages that tell which key was pressed, how much pressure was used for it, how long a note was held, etc. All these messages are sent to your computer and recorded as a MIDI file.
When you play this MIDI file back from your host program or other MIDI player, your computer sends these MIDI messages back to your instrument, telling it what and how to play. Thus creating a MIDI file is essentially creating instructions for a computer on how to order an electronic instrument to play sounds. Let’s say that when you record your MIDI track, you tell your devices: “Dear computer, please order my dearest piano to play staccato sixteenths in the second bar and ritenuto in the eighth, and to change tempo in bar number 45.“ Moreover, you can store information like the change of a program. In this way you can change a sound program that your instrument uses, at any desired point. For example, you may wish to use a thicker sound for the coda of your piece, with a pad or strings layered under your favorite piano tone.
One more great feature of the MIDI format is that it is easy and convenient to edit after an initial recording.
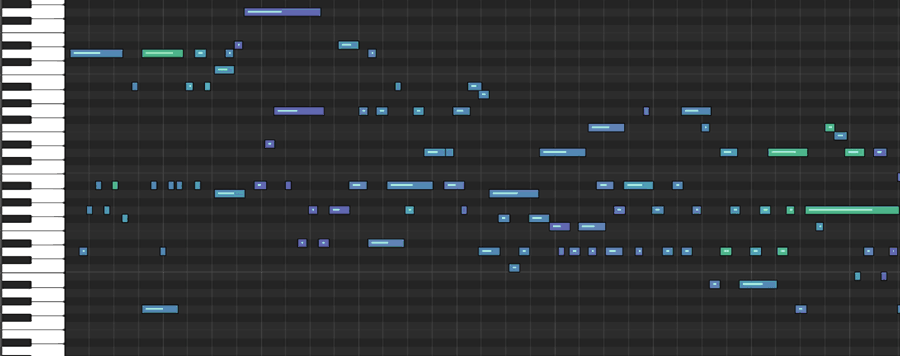
Has a wrong note been played accidentally? Just open a MIDI editor window in your program and correct, change, or replay it! Don’t have a sustain pedal? You can draw it in with a few mouse clicks. Can’t play a fast passage? Slow down the tempo for recording, then speed it up for playback. Did you change your mind and wish to modify intervals or chords in the middle of yesterday’s composition? A few manipulations and you’re done. No need to re-record the whole piece. Moreover, if you don’t like the sound of your budget instrument but a friend of yours has a better one, just bring your MIDI file to his place and ask to play it back with the sound of his instrument.
One more feature of the MIDI format is that you can use different channels for different instruments and for parts of your arrangement.

The MIDI format supports up to 16 channels and you can assign separated instruments to each one, enabling you to record and play them back at the same time. This gives you an orchestra or jazz band at your fingertips! So you can consider a MIDI file as a kind of music score that is written for a conductor and an orchestra. A MIDI program (a conductor) sends MIDI information to your digital piano, synth or virtual instruments (an orchestra), which, in turn, interpret that MIDI data and generate the actual sound based on the MIDI information received (which notes to play, loudness, timing, etc.).
Note: To play a few different sound programs simultaneously, your digital piano, synth, or VST instrument must support a multichannel MIDI format. It will play the same amount of sound programs (patches) as it has MIDI Outputs.
In addition, MIDI information doesn’t take up too much space. A MIDI file with one of Bach’s Preludes will probably require 10-15 kb. So then, what can you do with MIDI files and why would you need them?
The answer is that sometimes you need your music to be performed by someone else, including your computer or smart device. As said above, MIDI technology is like having an orchestra at your fingertips. Did your bass player get the flu and can’t play at tonight’s gig? Record his part as a MIDI track, run it at the gig with a VST bass, and play your solo. Need to practice your part at home at a lower tempo but want to hear the whole band? You can play the simulation of your band with a MIDI file at any tempo.
MIDI is also a format for all the music notation software. So nowadays you don’t need to be adept at writing sheet music to score your tune. Just play it and the machine will do the rest by writing it down for you. And of course, MIDI is a convenient way to save your performance for an audio recording. As we mentioned above, MIDI tracks are easy to edit, including after your performance.
Can’t play a wide arpeggio? Draw it with a mouse and set your MIDI track to play, even while you record it as an audio track. Yes going forwards, this is one of the biggest advancements of many contemporary music software platforms – that you can keep MIDI and audio tracks together. You can output your MIDI track to one of your digital piano’s channels or to any virtual instrument (VST plugin or stand-alone). In fact, outputting your MIDI track to an external instrument (like a digital piano) or to a virtual instrument is a way to make this MIDI track sound.
It’s like putting a list of sheet music on a puppeteer in front of a piano player. Then when pushing the play button you order to play it exactly as written. However, if MIDI is such an advanced and convenient format for musicians, then what are its limits? The answer is simple: it doesn’t have sound. As mentioned above, MIDI files don’t contain any information on sound themselves, but they contain instructions instead on how to generate sound with an electronic or virtual instrument (and sheet music is the same: a book of Bach’s WTC doesn’t contain the sound of Preludes and Fugues, but it gives you a way to play them).
Another pitfall is that “play it exactly as it written” can be misleading: your MIDI track might sound very different from computer to computer, or from one digital piano to another. The problem isn’t only in the quality of the sound itself, but different brands have different ways to sample, synthesize, amplify, and program their sounds. Also, if some amount of pressure on a D4 key on a Roland piano will trigger a very soft (pianissimo) D4 sound, on a Yamaha or a Casio it might trigger a much louder sound.
The same applies to articulations, sustain, portamento, and any other parameters that can be coded with MIDI messages. Besides, some of the controllers and codes may be used differently by different instruments. It means that during playback, essential MIDI information can be missed or misunderstood by an instrument and your piece of music will sound quite different.
You can solve this problem in an editing window of a MIDI program, which is exactly what many musicians do. However, if you wish to record a completed piece of music and be sure it always sounds exactly as you played or composed it, then you need an audio recording.
AUDIO OVERVIEW
Thanks to significant progress in sound technology, you don’t need a tape machine and thousands of meters of magnetic tape anymore. You can store your audio in digital files on a compact hard drive or even on a virtual iCloud. Hello free space in my room! Hurray! However, to record these digital audio files, you need to digitize an analog audio signal. In other words, to record your performance’s track in your chosen DAW, you need to do an analog-digital (AD) conversion and you need a converter for this – a computer audio interface (aka sound card) or a dedicated digital recorder.
So what are analog and digital audio signals?
The terms themselves explain the difference: analog audio is a format in which audio data is captured, coded, and stored as continuous (analog) signals, while in the digital domain, audio data is digitized – coded into and stored as a series of discrete numbers (digits). An analog audio signal is either a sound (a sound wave) captured with a microphone(s) or a pickup converted into electronic signals, and this is the way to record acoustic musical instruments.
Or it could be an electronic signal straight away, which is the case when you record your electronic instrument using its line outputs.
To listen to your digital audio recordings back, you need a digital-analog (DA) converter (e.g. your computer’s sound card) that decodes your audio files – digits with encoded audio information – back into electronic signals. Then your speakers convert these electronic signals to mechanical sound waves and voilá – you can hear your recording! What is very convenient with digital audio recordings is that you can open audio files with an audio editor to process and manipulate them. By processing and editing audio, you can change the final sound dramatically.
For example, you can correct the pitch of a false note, add the reverberation of a famous hall, or insert an applause that you did deserve for your performance, but unfortunately, didn’t have any audience for the moment of the recording! However, a basic concept of recording audio is that you can capture and replay recorded sound at any time, exactly as it was at the moment of the recording.
RECORDING MIDI
Let’s suppose that you decide to record a MIDI track. What do you need to do this? First of all, you need a MIDI sequencer, a program that allows you to record, play, and edit MIDI data. If your instrument has a built-in MIDI sequencer, then you don’t need anything else. Just follow your instrument’s manual and record your MIDI track(s).

However, your built-in sequencer can be less convenient than a similar one on a computer or a smart device. Keyboard screens are small and the editing process is not so advantageous as the computer-based versions. In addition, keyboards sequencers often have less channels (tracks recorded on top of each other) than computer-based sequencers, sometimes only one or two.
This means you can play a smaller variety of different parts of your arrangement with a smaller variety of instruments at the same time. What is great about built-in sequencers, though, is that you can use them everywhere, at any gig or rehearsal. However, with an external sequencer, you enjoy much more power in editing, recording, and, as we mentioned above, notating your music. What is important to understand before starting to play around with MIDI software and MIDI recording is what a MIDI track is, what a MIDI channel is, and what is the difference between them.
Since a similar principle also works for recording audio tracks and using audio channels, we think that it’s worth a few more lines on the theory. A MIDI Channel is a pass through in which MIDI information is being transmitted, while a MIDI track is a pass to and from the source where MIDI information is being recorded/played. Again, think of sheet music. Three staves are needed for scoring a piano-violin duo: one for the violin and two for the piano. Let’s say that all three are tracks passing through two channels – violin and piano. So we have one track for the violin channel and two tracks for the piano.
Thus, if your digital piano has 16 MIDI channels (the maximum number for MIDI format), you can use 16 different sound programs of your instrument playing at one time.
At the same time, you can record more than 16 tracks and send (output) some of them to the same channel. However, if your piano doesn’t support multichannel MIDI format, you won’t get more than one sound program at a time (but you can still use it to play sounds from other sources, like VST instruments).
To record with an external sequencer, you need to:
Step 1: Equip yourself with a suitable software. We will discuss possible choices in our DAW sections
Step 2: Connect your instrument to your computer or smart device. Following our easy MIDI Connectivity Guide.
Step 3: Check that in MIDI IN settings of your software your digital piano is set as an input device.
Step 4: If you want to use your piano sound, assign a desired sound program to a chosen MIDI channel.
Step 5: If your digital piano doesn’t support multichannel MIDI format, find its MIDI settings and note which channel is assigned as MIDI IN and MIDI OUT (for most digital pianos it will be Channel 1 by default).
Step 6: Create a MIDI track in your computer’s sequencer (following your software manual). Assign this track’s OUT as the chosen MIDI channel on your piano.
Step 7: If your digital piano doesn’t support a multichannel MIDI format, assign the MIDI track’s OUT as noted in step 5 regarding your keyboard’s channel.
Step 8: If you are using a VST plugin’s sound program, you need to follow your sequencer and VSTi manuals. The ways of assigning VST instruments to tracks vary. In some of the DAW’s there are special instrument tracks, in others you can just insert a plugin on a MIDI track.
Step 9: Follow your software manual or reference guide and record your tracks.
Note: You always need to pay attention to the corresponding MIDI channels of your keyboard and DAW, otherwise you may hear a wrong sound program or just silence.
You’ll find more details in your software and keyboard manuals since the methods of assigning vary between brands and software.
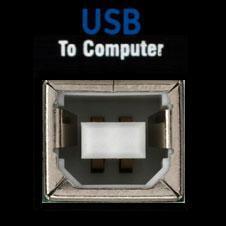
Recording a MIDI Instrument with USB Audio and MIDI
If your MIDI instrument has a USB port that can both send and receive MIDI and audio data, you’re in luck! Recording this device will be a breeze. First, connect the USB port on your instrument to a USB port on your computer. Then make sure that your DAW sees the USB ports of your instrument as both audio and MIDI devices. You’ll want to set up an instrument track to record and play back the MIDI data from your instrument, and to accept the audio input coming from the USB audio connection as well. This allows for the most flexible use of your MIDI instrument possible — you can record it, edit the recorded MIDI notes, and then hear the resulting edited audio coming back from your instrument.
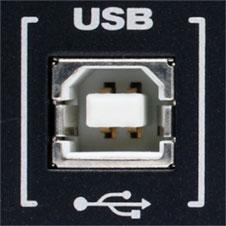
Recording a MIDI Instrument with USB MIDI Only
Many MIDI instruments that have USB ports will only send and receive MIDI data over USB. This isn’t quite as convenient as if your instrument could send both audio and MIDI over USB, but it’s still easy to work with. First, connect the USB port of your instrument to a USB port on your computer, and connect the audio outputs of your instrument to audio inputs on your audio interface. Next, set up a MIDI track in your DAW to record and play back the MIDI data from the USB connection of your instrument. Then set up an audio track in your DAW to record the audio inputs on your interface that you’ve connected your instrument to. Now your MIDI track will record and then play back MIDI to your instrument over USB, and your audio track will record the audio output from your instrument. Although connecting everything is a bit more complicated with this method, you’ll still be able to record, edit the recorded MIDI notes, and then hear the resulting edited audio coming back from your instrument.
Recording a MIDI Instrument with No USB Ports
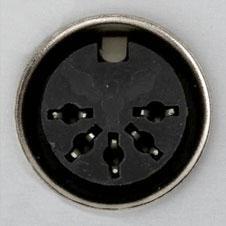
Some MIDI instruments, especially older ones, don’t have any USB ports at all. They will usually use the original 5-pin DIN MIDI ports. This requires a little extra gear but is fundamentally the same as recording a MIDI instrument with USB MIDI only. The big difference is that you’ll need a separate USB MIDI interface to send and receive MIDI between your instrument and computer. Some audio interfaces may come with a built-in 5-pin DIN MIDI interface; otherwise, you can purchase a dedicated one. You can buy inexpensive MIDI interfaces with a single MIDI in and MIDI out port, such as the M-Audio MIDISport 2 x 2, or fully featured rackmounted MIDI interfaces, such as the MOTU MIDI Express series with up to 8 x 8 MIDI ports, depending on how many MIDI devices without USB you have. Once you have your MIDI devices connected to your computer via a USB MIDI interface, the rest of the process is identical to the prior method: recording a MIDI instrument with USB MIDI only.
RECORDING AUDIO
How do you set up for recording your live or MIDI-recorded performance?
One of the advantages of digital pianos is that you don’t need to set up a complicated configuration of microphones to capture sound. Just connect your keyboard to an audio recorder and that’s it! You can begin recording. A number of devices may serve you as audio recorders, including dedicated recorders like Zoom and Tascam or computer audio interfaces. To choose the option that’s better for you, consider the following questions:
– Where am I going to record my piano?
If you are going to record at your home studio, then the best choice will be an audio interface or sound card. This will give you the opportunity to work with a DAW. At the same time, if you are going to record your live performances at gigs or rehearsals away from your own place and you need something simple but mobile, then the best option might be a compact digital recorder.
This can be a convenient choice as well if you are not going to use an external sequencer, but are going to use your instrument’s built-in MIDI sequencer instead. Lastly, one more feature of these devices is that dedicated digital recorders have a built-in microphone(s), which can be handy in some situations, especially if you’re not only a keyboardist but also a singer.
– How many channels am I going to record?
For a quality digital piano recording, you need at least two channels to make a stereo recording. Why?
First, because a real piano is an instrument that produces sound from a sizable area of its big body. If your listening position is at the center of the piano, you can clearly hear that low sounds are louder to the left, while high sounds are louder to the right.
Secondly, some of your instrument’s sound programs can be set in stereo, and recording them in mono (on 1-channel) can degrade their sound drastically.
Note: In some cases you might still prefer a mono recording, as when you don’t have enough space on your hard drive, or when you are recording for an arrangement where your piano needs to be placed as a mono for some artistic reason. However, the standard panoramic configuration for piano sound is stereo.
Most dedicated recorders (but not all of them!) have at least two channels for recording, but some audio interfaces – like the PerSonus AudioBox iOne – have only one. This is because they are designed for solo artists like singers and guitar players who commonly need only one recording channel.
However, you might consider recording together with other musicians, so you probably should have more than two channels. Think carefully about this when you choose your recording device. You might want to check a few options in our short Audio Interfaces and Digital Recorders sections.
– What are my audio quality standards?
This question is linked with your budget and your most common reasons for recording. But what you need to be sure about is that you are able to get your audio tracks with at least 44.1 kHz sample rate and 16-bit of depth. The reason is that only 44.1 and higher sample rates give you the entire human hearing’s frequency range, which is from 20Hz to 20kHz.
A bit depth parameter is responsible for dynamic range of your audio recordings and it’s smoothness. Nowadays, the professional standard for recording is 24 bits, so it is preferable to record with 24-bit depth. You can downsize to 16 bits at the final processing stage if needed.
However, the real quality depends not only on the numbers, but on the quality of your hardware. You’ll get better-sounding tracks at 44.1 kHz and 16 bits with RME Babyface than at 88.2 kHz and 24 bits with the built-in sound card of your motherboard.
At the same time, even with a built-in card you can record your ideas and memorize inspired moments. This quality may be enough for you if you want to share your music with your friends or show it to potential producers and investors.
Try what you already have before spending money on more expensive devices. Sometimes even your mobile phone can be used as a recorder. Why not? So, how can you record your piano? First, you need to find what options you have. Do you have line outputs, digital out, or only built-in speakers and headphone out? Or is your keyboard a midi-controller only without build-in sounds? Let’s have a short look at each option.
DIGITAL RECORDING
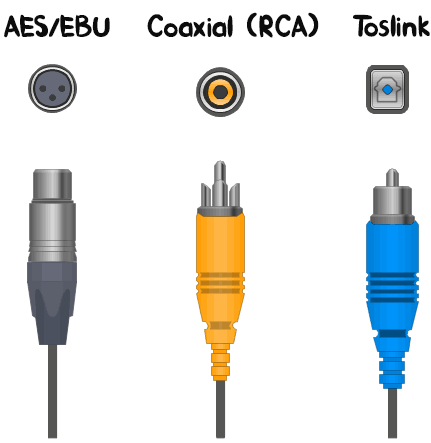
If you have a digital out on your keyboard, you are most likely a lucky person with an expensive instrument, with a built-in AD convertor. But to record digitally, both your keyboard and recording device must have digital connections (input/output). The majority of digital pianos and audio interfaces will have such connection sockets, such as Toslink, Coaxial (RCA), or AES/EBU. Usually, you can use an adapter for connecting different types of digital sockets. Refer to your devices’ manuals to check what connectors and cables will work for your setup.
It is impossible to outline a step-by-step instruction on digital recording here because this process can vary greatly from device to device and software to software. However, we would like to point a few general things that will help you understand the basics of digital recording:
- You must connect digital to digital and analog to analog. You can’t mix digital and analog channels, except with a dedicated converter or if the input/output of your devices are designed to carry both types of signals.
- You must keep all your digital devices in sync (digital clock). To do this you must assign one of your devices as a “master” and all others as “slaves.” Your master device will provide timing data and all other (slave) devices in your chain will be locked to it.
- This procedure is necessary for recording and storing audio data correctly, since digital streaming entails transmitting discrete numbers. If an output device (digital piano) generates 44100 samples per second, for example, but the input device (audio interface) receives 48000 samples per second, you can get errors between original and recorded data.
The peak levels of your recording should never exceed the 0 dBFS point, which is the maximum possible digital level (loudness). You usually have a volume meter with your recording device, whether a software one (with audio interfaces) or an on-screen one (with digital recorders). Please refer to your device manual for more details.
Note: Some digital pianos have a built-in USB Audio Interface, which allows them to transfer digital audio via their USB port, while normally USB ports on digital pianos only support MIDI data.
Many Yamaha digital pianos (portable keyboards, synths, workstations), as well as some Korg, Roland, and Dexibell instruments have this feature, so make sure to check the owner’s manual to see if your instrument supports audio via USB. If it does, consider yourself lucky, because you can connect your piano to a computer via USB and record high-quality (digital) audio signal directly into your DAW without using any additional equipment or cables.
RECORDING AUDIO WITH A MIDI CONTROLLER AND VST INSTRUMENTS
If you use your piano as a MIDI controller and are recording sounds from your VSTi plugins or other virtual instruments, you’ll usually need to render your audio only. Refer to your software manual on how to do it, as the methods can vary from one program to another.
RECORDING WITH A HEADPHONE OUTPUT
If your keyboard has a stereo headphone output only, you can use it. What you need to remember is that the headphone out on your digital piano is not designed for connecting to line inputs, unless stated in your instrument specifications.
As a result, the strength of the output signal can be too high for a standard “line in” on your recording device, so please be careful with connecting your devices.
Note: To be sure that you are not at risk of damaging your recording device, always set your headphone volume to a minimum when connecting your devices the first time and increase the volume level slowly. Your headphones stereo output will have a socket either for a 1/4” (6.35 mm) TRS standard jack or a 1/8″ (3.5 mm) mini-jack connector.
Your recording device can have either mono or stereo inputs. If your recording device has a stereo input, use a stereo (balanced) cable and appropriated adapters to match connection sockets that can be TRS, RCA, XLR (Canon), or Combo (TRS + XLR). If your recording device has separated mono inputs (most likely), you can use a Y splitter or an adapter that will split your stereo (2 channels) signal into two mono (1 channel) signals.
Note: To connect stereo out to stereo in (usually 1/8″; 3.5 mm), you need a stereo (balanced) cable with stereo connectors (1 tip, 2 rings)! You can’t use a mono (unbalanced; 1 tip, 1 ring) cable to carry a stereo signal!
If for some reason you are going to output your headphone stereo out to mono in (e.g. your audio interface has only one input, so a Y-splitter is not an option), you’ll need a dedicated adapter that utilizes resistors to prevent back-feeding outputs to each other. A simple mono-to-stereo cable or adapter is not recommended for this procedure. Doing so can damage your output device (digital piano).
When you directly connect a stereo out to a mono in, even if it sounds ok, you can burn your outputs. When you simply attach two signals (left and right) together, you are driving both output circuits to back-feeding and dropping impedance, thus forcing them to a current limit and potentially destroying them. In the best-case scenario, you’ll get a noisy signal with pops and clicks. At worst, you’ll burn your stereo output.
You need a proper adapter that utilizes resistors to match the output/input impedances of your devices to drop the current. While modern devices should have decent over-current protection in the output circuits, it is safer to never output stereo signal to mono without a proper adapter. Such adapters can be hard to find and pretty expensive. Here is one I found on Amazon with a 1/4″ stereo plug. There’s also another version of this cable with a 1/8″ stereo plug. If you need to record a mono track of your piano, the best way to do so is to use one of its line mono outs specially designed for this purpose.
We will discuss this approach in the next section, but for now we will share some information that will help you to get the best sound quality possible:
- Very often, a signal from the headphone out will be noisier and more distorted, so always use line outs when possible.
- Outputs and inputs on your devices (keyboard and recording device) can be mono balanced (TRS), mono unbalanced (TS), and stereo unbalanced (TRS).
- Balanced (mono) audio signal runs along three wires, while unbalanced needs only two; balanced and stereo (cables) are the different names for the same type of 3-wire cables.
- A balanced (stereo) cable can carry a balanced mono signal [tip (+), ring (-), shield (ground)] OR an unbalanced stereo signal [tip (left), ring (right), shield (common)]
- Balanced audio signal is less susceptible to noise problems (reversed polarity theoretically cancels all the noise), especially when transmitting audio signals over longer distances (when you need cables 6 meters/20 feet and over); at the same time unbalanced audio can have a stronger signal.
- To carry a balanced audio signal you need all the elements to be balanced: output, input, and cable. When you connect a balanced output to an unbalanced input or through an unbalanced cable, you lose noise protection and the audio signal becomes unbalanced.
- Most consumer-grade digital pianos will have unbalanced outputs (line and headphone outs).
- A 1-socket stereo output is always unbalanced; to keep your stereo signal balanced you need 2 balanced (3-wire) cables.
RECORDING WITH LINE OUTPUTS
Check your keyboard manual or look online to identify line outputs on the body of your instrument. These are usually located on the back panel of a keyboard and labeled as Line Out, Aux Out, Stereo Out, etc. Typically they are 1/4” TRS (jack) sockets. As mentioned above, if you are going to connect your keyboard to a Mono In on your recording device, the best way is to use a dedicated Mono Out on your instrument. This is usually a left output and is labeled as L/MONO OUT. Sometimes, though, a right output can be designed for this (R/MONO OUT).
As we already explained above, if you don’t want to damage your instrument, you need a proper adapter to connect stereo OUT to a mono IN. A dedicated mono out is designed for that and summarizes both audio signals (left and right) when the second output is not in use.
If, for example, your instrument has L/MONO and R outs, you must take the signal from your left OUT for a proper mono recording. From your right OUT you will only get half of your audio signal. However, as I mentioned earlier, the best way to record your digital piano is in stereo, which means you’ll need to connect both line out jacks (right and left channel) to your recording device. After you have found your instrument outputs, you need to find the inputs on your recording device. It is very likely that you’ll see labelling similar to your keyboard’s labelling, but instead of OUT you’ll see IN.

The input sockets can be TRS, XLR, or Combo. In some cases, even a 3.5 stereo mini-jack socket may be present. Here are the cables you’ll need to connect your digital piano with dedicated line outputs (R and L jacks) to your recording device.
If your recording device has a single stereo input (1/8″ jack), you’ll need a 1/8″ TRS to dual 1/4″ TS splitter (or a 1/4″ TRS to dual 1/4″ TS if your recording device has a stereo 1/4″ input).
However, most likely your recording device will have two (or more) separate line mono inputs (often as a part of a TRS + XLR Combo jack), so you’ll need a dual 1/4″ TS to dual 1/4″ TS cable to send both Left and Right channel audio signal from your piano to the recording device.
If both your outputs and inputs are balanced, then it makes sense to use a dual 1/4″ TRS to dual 1/4″ TRS cable for a balanced connection. Some pro-grade digital keyboards will have balanced XLR jacks, which can be used as an alternative to line out TS/TRS jacks.

XLR Connectors (right – male; left – female)
If that’s the case, you can use two XLR Male to Female cables, provided your recording device also has XLR line inputs. Note: Please read your device manual carefully. XLR inputs are normally designed for connecting microphones and have a different voltage level. Connecting to the wrong type of input can lead to distorted or noisy recordings. If your recording device only has TRS mono jacks (balanced), then you can use two XLR Female to TRS cables for a balanced connection.
RECORDING DIRECTLY WITH YOUR BUILT-IN SOUND CARD
There is nothing special about recording with the built-in input of your laptop. Please refer to your notebook manual to find what input socket do you have, whether mono or stereo. Also, consider that due to its compact size, your notebook may have the audio socket for either the in or out signal only. This means that it can have a different configuration to carry the signal. Please read your manual’s specifications and follow them to find an appropriated cable, connectors, and adapters.
Note: Although it is often possible to record the sound of your piano directly onto your laptop/PC, it’s most likely going to be a mono recording (via a mono Mic In jack), which is less than ideal.
Unless your computer has a Line In port, you’ll be sending a line level signal (or even a headphone out signal) to a mic level input, which may overload the port and cause noise and distortion. A dedicated recording device (e.g. audio interface, digital recorder) will always deliver a much better quality than your computer’s built-in audio chip. A lot of modern laptops and smart devices have a dual jack (TRRS), which combines a headphone out and mic in jack. This jack is used either for connecting your regular headphones or headphones with a built-in mic that have a triple-ring plug connector (TRRS). This connector has an additional contact that carries the microphone signal.
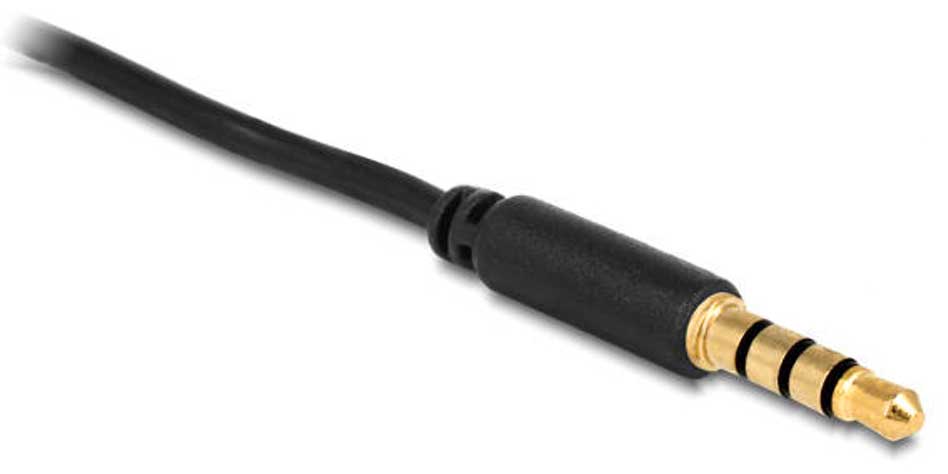
TRRS Plug Connector
So, if you want to use your computer or smart device to record your piano keyboard, you’ll need an adapter that will split the signal and give you a separate headphone out and mic in socket. You can use either a USB audio adapter, which connects to the USB port of your computer/smart device, or a TRRS Y splitter cable, which connects directly to your dual headphone/mic jack.
RECORDING YOUR PERFORMANCE (SOFTWARE ASPECT)
Please refer to your recorder or DAW manual for information on how to assign the input channels of your recording device to the tracks on which you are going to record. Usually, you will have a choice: to record on one stereo or on two separated mono tracks.
Note: If you are looking for a realistic piano sound, pan your tracks so that you have your lower staff (left hand notes) panned left and your higher staff (right hand notes) panned right.
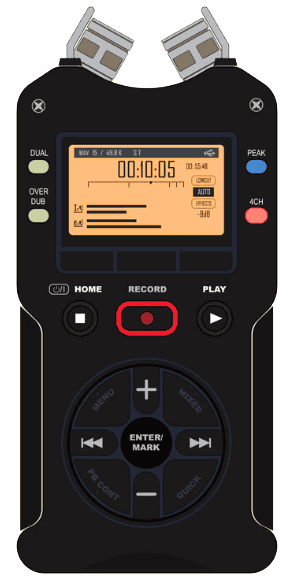
Now you can begin your recording. Push a recording button (real or virtual) and perform your music. Don’t forget to save your recording!
CHOOSING A RECORDING DEVICE
There are plenty of devices on the market now. It is impossible to go through all the options, but to give you an idea of what’s available, we’ll mention a few of the most popular choices and note which ones are worthy of consideration. But first, here are a few more general thoughts.

As mentioned earlier, if you are choosing a recording device to record music – and a digital piano is definitely a music instrument! – then you’ll need to be able to record with at least 44.1kHz and 16 bit of sample rate/bit depth. Some of the pocket digital recorders can give you less because they are designed as Dictaphones for journalists. Also, some of the recording devices – both recorders and interfaces – could have a few inputs but only one channel. If in the specification of a device it is stated that it has only one channel, this means that you can record only one track and through only one input at a time.
One channel with a few inputs – such as a microphone, instrument, and line, for instance – is designed because different signals have different voltage levels and request differing input impedance. So it can be like one room with multiple doors, but as soon as you open one, all the other doors close automatically. Finally, what is the main difference between interfaces and recorders from a practical point of view?
With an interface you can record directly into your DAW, in sync with your other tracks. Using a digital recorder you need to import your files afterwards, and if you have some other tracks in your recording session, you will have some fun with syncing them together, especially if you want a few takes of the song. At the same time, with a recorder you can just push the button and record, while with an interface you need a computer and software to do this. However, you can find combined devices that work either, as a stand along recorder or as an interface.
AUDIO INTERFACES
If you decide to go with an audio interface, you have a vast number of options with a wide range of prices. For example, you can get 6 simultaneous analog inputs with Steinberg UR44 for about $300 and only 4 with an RME Babyface for around $1,000. To understand this disparity, you need to realize that quality, functionality, and reliability come with a price. For example, a good quality transformer for a channel’s amplifier could cost well over $100, and this is only a transformer for one channel! But at the same time, you can get acceptable quality (for your purposes) even with a built-in sound card.

You need to understand your focus and what your performance requires. Your skills as a piano player? Your skills as a keyboardist and MIDI controller operator? Or do you need top quality sound to convey all the beauty of your piano tone, even those shades that can’t be heard on cheap consumer speakers and which will be lost with MP3 conversion? To decide, remember that people still listen with admiration to performances of Count Basie or Oscar Peterson, whose recordings are sometimes much worse sound quality than a student might make on a mobile phone at a school assembly performance.
CHOOSING A DAW FOR YOUR MIDI/AUDIO RECORDING
When you are recording with a computer or smart device, you need a program that will play the role of your recorder/player and editor. Selection depends on your targets and goals. If you need to record only your mono or stereo tracks, you probably don’t need a complicated or expensive program. A simple audio recorder and editor can easily work for you. For example, you can download Audacity – it’s a free software. If you work with a Mac then you have GarageBand included with your macOS bundle. The advantage of GarageBand is that it also accepts MIDI input and has a library of virtual instruments and sounds, so you can record, play and edit MIDI tracks too.
However, GarageBand doesn’t have MIDI Out, only MIDI In. So, while you can play MIDI files with built-in virtual instruments, you can’t transmit MIDI messages to your digital piano to play your piano sound. Also, if you don’t need a multitrack recorder (a recorder that can record and play separated tracks simultaneously) you can check on WaveLab or Sound Forge suites. These are very powerful audio editing suites.
Some of the programs are designed for notation. These are MIDI sequencers. The most popular is Sibelius. If you are a classical or a jazz musician, who is looking to produce not only your audio tracks but also your sheet music – Sibelius is choice number one for you.
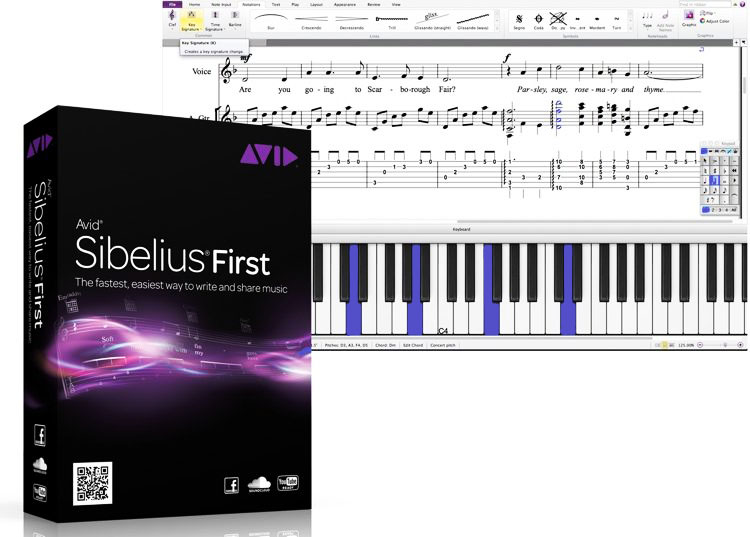
It has a great sample library built-in and will play your compositions either with its own or with your keyboard’s sounds. You also can render the audio file of a completed work, if you use built-in sounds. But you won’t be able to record the audio track of your piano sound. The next category of DAW is multitrack recorders. They offer you the whole range of recording and editing features. You can record, playback and edit MIDI or audio; you can produce multitrack recordings and render audio. You can produce a completed audio project.
Those who are focused on audio production and sound post-production often choose ProTools or Nuendo. Composers often prefer Cubase or Logic Pro X (this DAW is available only for Mac users). All these four programs also have the feature of working with video, and if you are establishing your career in film or the game industry, it could be the right choice for you.
FINAL WORDS
We hope that you now understand the basics of recording audio and MIDI and are ready to get your own personal set-up that suits your space, requirements, and budget. We hope this guide will help you move forward with your music-making goals. Should you have any questions or suggestions, please do not hesitate to leave a comment.